Description
The SQLUpdateV2Receiver can be assigned to a Domain and used to create a database table (e.g., Oracle, MySQL, etc.).
In This Article
- Step 1 - Assign the SQLUpdateV2Receiver to the Domain
- Step 2 - Create a Configuration File
- Step 3 - Update the Receiver Parameters
- Step 4 - Add the create table syntax to the data tab
- Step 5 - Download and Run the Scenario
Step 1 - Assign the SQLUpdateV2Receiver to the Domain
Assign the SQLUpdateV2Receiver to the Domain that requires table creation. In this example, it has been assigned to a User Domain.

NOTE: For information on assigning a Receiver to a Domain, click here.
Step 2 - Create a Configuration File
This Receiver utilizes a configuration file stored locally on the user's computer or a shared test server to obtain the necessary information to connect to a specific database via JDBC. For detailed information, refer to 'What is a JDBC Config File?'
Note: More details about this Receiver can be found in the SQLUpdateV2Receiver article.
Step 3 - Update the Receiver Parameters
The Receiver parameters must be updated to reflect your Resource Path and Name. For this example, the config.properties file exists in the path defined for the user's resource.jdbc.directory Organization Resource.

Step 4 - Add the Create Table Syntax to the Receiver's Data Tab
Select the Data tab and add the create table syntax. Remember to save the change once finished!
A MySQL example is shown below:
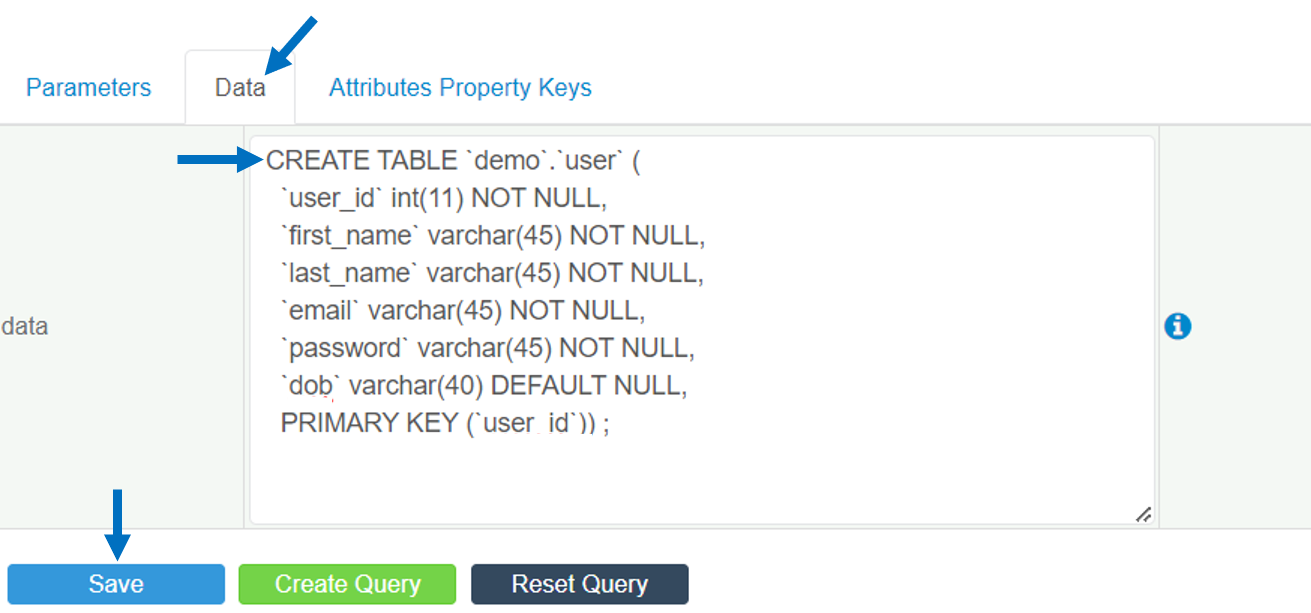
IMPORTANT: Make sure to use the create table syntax that matches the database table you are creating.
Step 5 - Download and Run the Scenario
The SQLUpdateV2Receiver will create the table when the Scenario is run from a command line. This can be done in several ways depending on which features are used within the GenRocket platform.
A Scenario, Scenario Chain, or Scenario Chain Set can be run using the command below.
genrocket -r <ScenarioName.grs>NOTE: For more information about this specific Receiver, see How do I use the SQLUpdateV2Receiver?