Overview
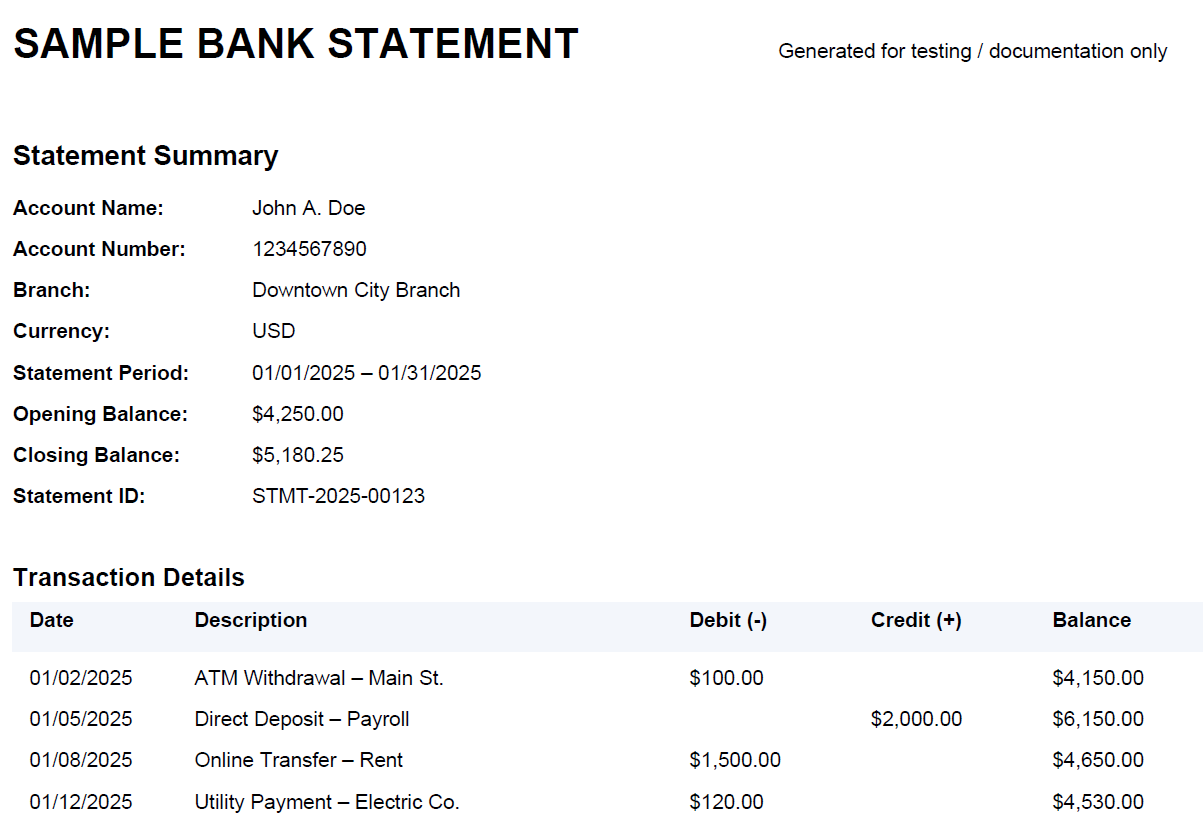
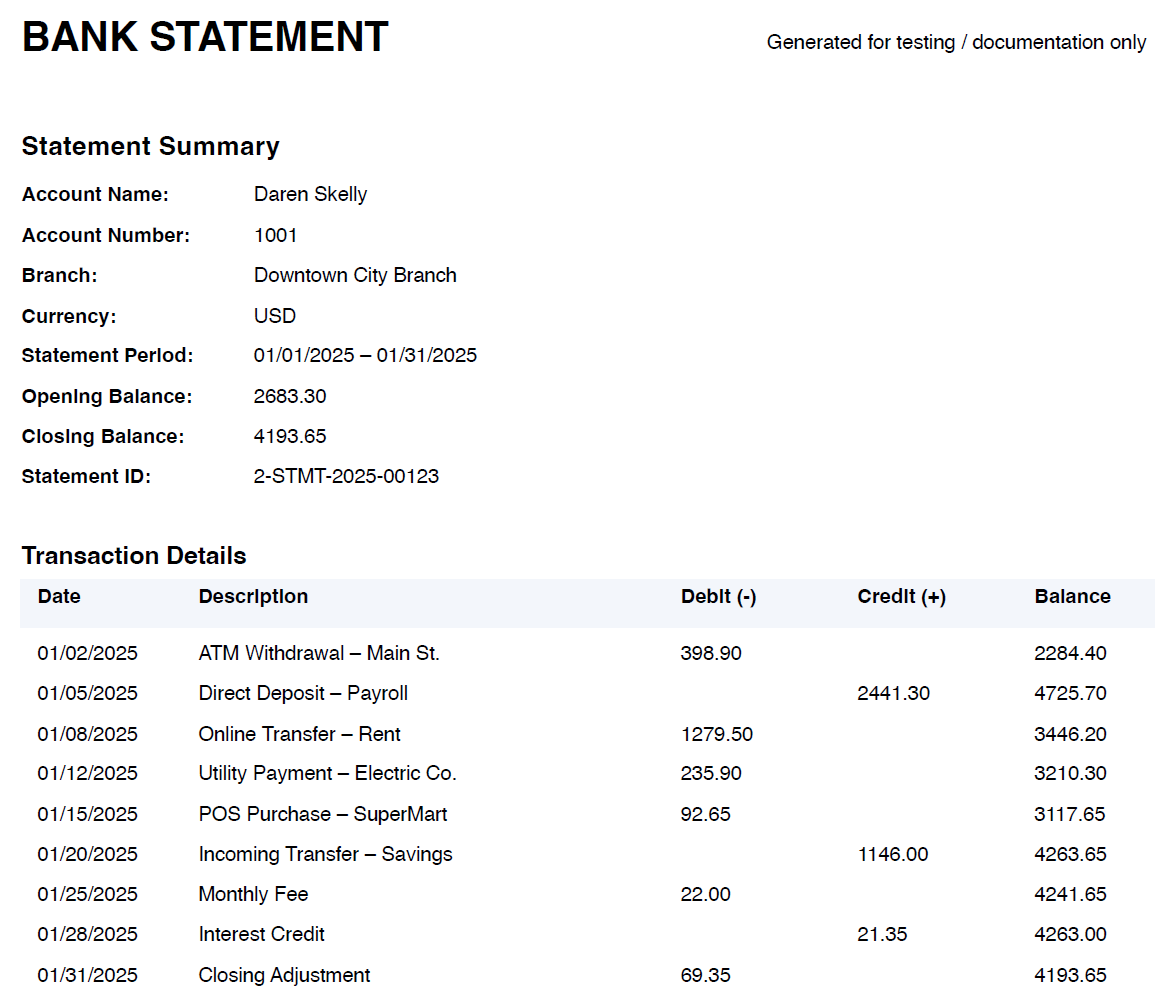
This article provides a step-by-step walkthrough for importing a Bank Statement PDF using the Unstructured Data Accelerator (UDA) and generating bank statements containing synthetic data values. The following bank statement will be used for this example and is attached at the bottom of this article.
Objective
A user wants to generate 10 bank statements containing only synthetic test data. The following values will change on the bank statement:
- Account Name
- Account Number
- Opening Balance
- Closing Balance
- Statement ID
- Transaction Details - Debit, Credit, and Balance (for each transaction)

Note: To keep this example simple, currency formatting will not be applied to the debit, credit, and balance values.
In This Article
- Prerequisites
- Step 1 - Import the PDF to create a Template
- Step 2 - Customize the Template using the Template Editor (Optional)
- Step 3 - Export the Template to set up the Project
- Step 4 - Review the Project
- Step 5 - Perform Generator Tuning
- Step 6 - Change the GrRoot Domain loopCount
- Step 7 - Download the Required Files
- Step 8 - Generate PDF Documents
- Sample Output
- Next Steps
Prerequisites
- Verify the source PDF meets defined requirements - UDA currently only supports digital PDF source files. To see the full list of requirements and limitations, please take a moment to view the UDA Overview page.
- Complete the initial environment setup - All prerequisites are covered in this article, including links to install the GenRocket Runtime - UDA Environment Initial Setup Steps.
Step 1 - Import the PDF to create a Template
- Create or select a Project and Project Version.
- Expand the New Domain menu and select Import from PDF.


- Browse and select the source PDF file, then save.

- Wait for the file to process and the template to be created.
Note: For step-by-step instructions with images, please see this page: UDA Template Editor - Import a File and Customize the PDF Template for Project Setup.
Step 2 - Customize the Template using the Template Editor (Optional)
Fields (headers and data values) will be automatically extracted from the source file and included in the template as a label (orange) or automatic variable (blue). In some instances, the template may need to be customized before it is used to set up the Project. Here are a couple of examples:
- If a field is empty, a manual variable must be added for synthetic data to be generated.
- A placeholder for an image, QR code, or barcode needs to be added to the template.

For this example, a few simple changes will be made. You can save changes and return as needed, as long as the template has not been exported
Change 1 - Remove Labels and Change a Label Value
If the value a label represents will never need to change, it can be removed from the template. This will reduce the number of Attributes in the Domain. Only keep the ones that might require the value to be changed now or later.
For example, only the 'document_title' label will remain, and the rest will be removed. The 'document_title' label value will also be changed from 'sample bank statement ' to 'bank statement'. Follow the steps below:
- Filter to Labels
- Select Edit
- Use the checkboxes to select each label
- Select the Delete button and select Delete in the confirmation window
- Locate the label and change its value
- Select Apply


Change 2 - Remove Unnecessary Automatic Variables
For this example, several values will remain the same and do not require synthetic test data. These include the following:
- Branch
- Currency
- Statement Period
- Transaction Details (Date, Description)

Complete the following steps to remove these automatic variables:
- Filter to Automatic Variables
- Select Edit
- Use the checkboxes to select each Automatic Variable
- Select the Delete button and select Delete in the confirmation window
- Select Apply


Note: to learn all about the template editor and how to customize a template, please see this page: UDA Template Editor - Import a File and Customize the PDF Template for Project Setup.
Step 3 - Export the Template to set up the Project
You must export the template to set up the Project.
- Select Export at the top of the Template Editor.

- Three options are provided: Cancel, Save Instead, or Export.
- After exporting, you cannot make further changes to the template.
- Select Export to continue.

- Go to the Project Dashboard and wait for the setup to finish.

Step 4 - Review the Project
Verify it has been properly set up. Each page should have a Domain. Labels and Variables will be Attributes within the appropriate page Domain. A table discussing everything that should be set up is provided directly after the image below.
Note: The Project for the source PDF bank statement is shown below. Please note that the Project may take a few minutes to set up, depending on the template size.

| GrRoot Domain | Assigned the SegmentDataCreatorReceiver and GrRootScenario. |
| Domain for each page (page1, page2, ...) | Each contains an Attribute for each label and variable with a default assigned Generator. Assigned the SegmentDataCreatorReceiver to each. A Scenario should be present for each page. |
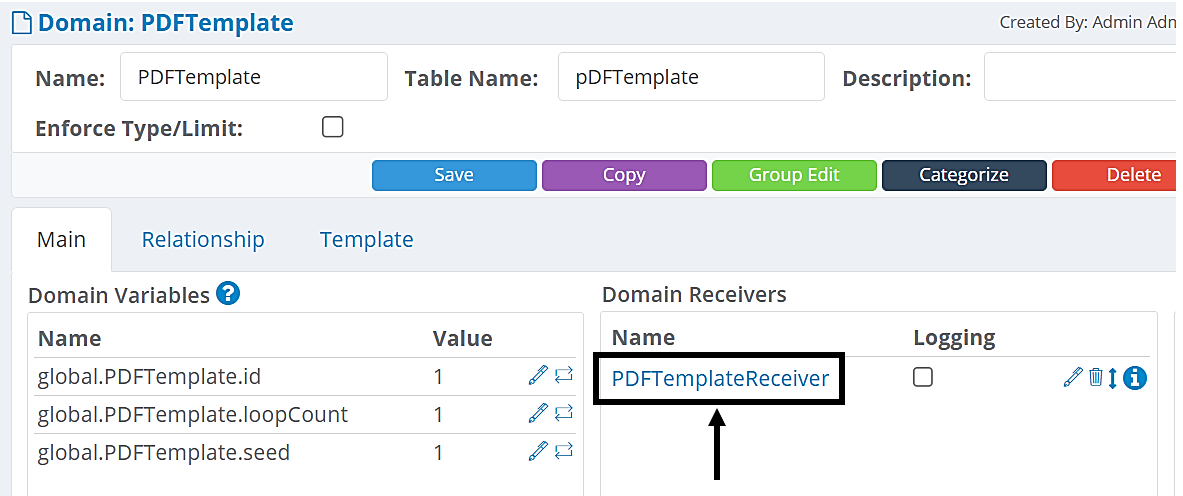
| PDFTemplate Domain | Assigned the PDFTemplateReceiver and PDFTemplateScenario. |
| Merge Domain | Assigned the JSONSegmentMergeReceiver and MergeScenario. |
| Scenario Chain | Containing all other Scenarios in the appropriate order for test data generation. |
| Domain Relationships | Automatically set up for the created Domains. In this example, grRoot is the parent of page1. |
| Configuration File | Automatically created for the Project. |
Step 5 - Perform Generator Tuning
Make necessary changes to the assigned Generators to ensure correct data generation. This can be done through the Generator Tuning Wizard or by making changes to individual Attributes. Link Generators for more complex attribute test data.
The image below shows a preview of the data generated for the first 15 Attributes (a total of 28 in this document). Each line represents the data for one document.

For this example, the following Generators have been used:
| Attribute(s) | Generator(s) | Description/Notes |
| Account Name | FullNameGen | Only includes first and last names - no suffixes, middle name, or prefixes (change percentages to 0) |
| Account Number | RangeGen | Generates account numbers starting at 1000 that increase by 1 for each iteration. |
| Statement IDs | RangeGen, ConstantGen, ConcatGen | Generates increasing Statement IDs (e.g., 1-STMT-2025-00123, 2-STMT-2025-00123). The ConcatGen is used to combine RangeGen and ConstantGen values. |
| Opening Balance and Transaction (1-9) Credits/Debits | RandomMoneyGen | Generates random range of money values for each. The range varies per Attribute. |
| Transaction Balance (1-9) | CalcGen | Maintains the balance as credits and debits ae applied for each transaction. For each credit or debit, the value is added or subtracted from the previous balance. |
| Closing Balance | ConstantGen | References the Transaction 9 Balance (last transaction). |
Step 6 - Change the GrRoot Domain loopCount
Ideally, users should set up G-Cases to generate different volumes and varieties of test data. For this example, only the GrRoot Domain loopCount will be changed to 10. This way, we can quickly show how to generate a small batch of documents. The steps for using G-Case are the same as for any other project.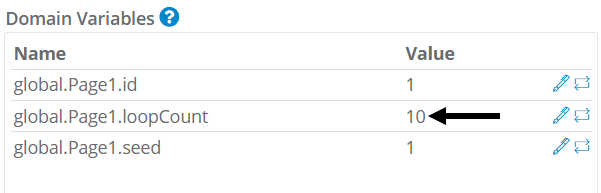
Step 7 - Download the Required Files
Four files are needed to generate synthetic PDFs. File placement details for each are provided below. This step is unnecessary when using G-Repository.
7a - PDF Template and PDF Config Files
The PDF Template and PDF Config Files are both downloaded from the PDFTemplateReceiver that is assigned to the PDFTemplate Domain. To download them from the GenRocket web platform, complete these steps:
- Select the PDFTemplate Domain in the Project Dashboard.
- Select the PDFTemplateReceiver in the Domain Dashboard.
- Select Download PDF Template and Download PDF Config.

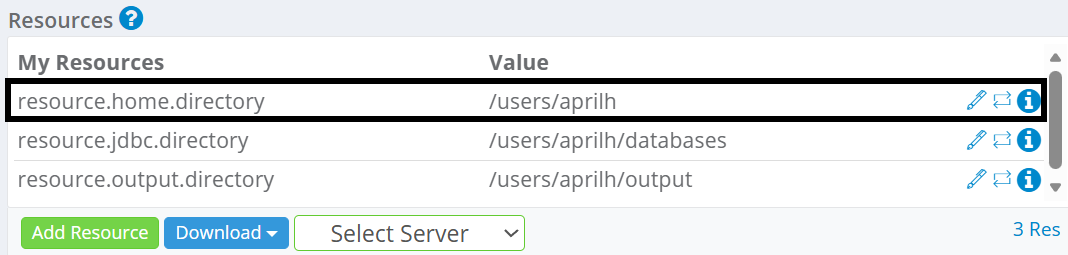
- Place the PDF Template in the location highlighted below. Example: /users/<username>/output/templates


- Place the PDF Config File in the location highlighted below. Example: /users/<username>/output/config

7b - Config File
The Config File must be downloaded and placed within a config folder in the user's output directory.
- Select the Download icon.

- This file should be placed here:

7c - Scenario Chain
- Select the Download icon for the Scenario Chain in the Project Dashboard.

- This file can reside in your home directory. Example: /user/<username>
Step 8 - Generate PDF Documents
This can be done at the command line. The genrocket -r command will be used for this example. However, the command will differ for G-Cases or when using other features.
Command:
genrocket -r <ScenarioChainName>
Example:
genrocket -r JSON1ScenarioChain.grs
Sample Output
The generated files can be found in a 'PDF Output' folder in your output directory. Three images are provided below: 1) generated files, 2) First Bank Statement, and 3) Second Bank Statement.

Statement 1

Statement 2
Next Steps
Set up G-Cases to generate different variations and volumes (e.g., negative, edge, load).