Description
To get started with GenRocket, you will need to complete a few basic installation and setup steps. These steps typically only need to be completed once for first-time users, except for occasional GenRocket Runtime updates, and include the following:
- Download GenRocket Runtime
- Extract the GenRocket Runtime File
- Modify the Shell Startup File
- Run the "genrocket" Command in your Terminal Window
The GenRocket Runtime is used to generate data on your local machine or server. It acts like an engine on your local machine and follows the instructions within the Scenario to generate the test data. The GenRocket Runtime must be installed on your local computer to run Scenarios and generate your test data.
Need to Update GenRocket Runtime Only? Please see one of the following articles:
Need to see a list of supported Java Versions? Java must be installed on the computer that GenRocket Runtime will be set up on. To see the complete list of supported versions, click here.
In This Article
- Step 1 - Download GenRocket Runtime
- Step 2 - Unzip and Rename the GenRocket Runtime File
- Step 3 - Installing on MacOS/Linux
- Next Steps
Step 1 - Download GenRocket Runtime
- Log into the GenRocket web platform.
- Expand the Options Menu in the navigation bar.

- Click Download Runtime #.#.#. The version number you are downloading may not match the version in the screenshot.

Step 2 - Unzip and Rename the GenRocket Runtime File
The GenRocket Runtime file must be extracted, renamed, and moved to your home directory.
Note: The images below show how to perform these steps for Mac OSX. Some steps might vary if you are using the Linux operating system.
Complete the following steps:
- Navigate to the directory where the file was downloaded. This is usually your downloads folder.
- Right click on the file and click Open to extract it automatically.

Note: If you use a specific extraction program, you may need to select the Open With option and then click on the appropriate application.
- When extracted, the folder name will appear like this: genrocket-#.#.# (the #'s are digits) and must be renamed.

- Rename the folder to genrocket.
- Right click on the folder name and choose Rename.

- Remove "-#.#.#" from the folder name.

- It will appear as shown below once renamed:

- Move the genrocket folder to your home directory. For Mac OSX, this is typically: Users\User Name. This may vary per computer and operating system.
- Right click on the genrocket folder and then click on Copy "genrocket".

- Navigate to your home directory. For Mac OSX, use this shortcut key combination when viewing your files: CMD+SHIFT+H.
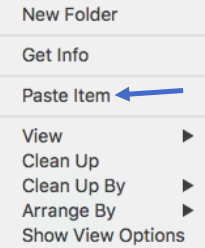
- Right click and click Paste Item to paste the folder into your home directory.
Note: Once the file has been placed in your home directory, steps will need to be taken to finish the installation based on your specific operating system. See below to learn more about installing GenRocket Runtime on your specific operating system.
Step 3 - Installing on MacOS/Linux
To complete the installation, you must edit your shell's startup file. This is typically .bashrc, .profile, or .bash_profile in your home directory. However, it may also be something else, such as .zsh for MacOS.
Add the following lines:
export GEN_ROCKET_HOME=~/YourPath/genrocket
export PATH=$PATH:$GEN_ROCKET_HOME/bin
If you will be running Java versions 1.9 to 1.15, then an additional command may be necessary for this setup:
export JAVA_OPTS=-Xms512m -Xmx2048m --add-opens java.base/jdk.internal.loader=ALL-UNNAMED --add-opens jdk.zipfs/jdk.nio.zipfs=ALL-UNNAMED
Note: Java versions 1.16+ have not been tested with GenRocket Runtime.
Special Note About Shell Startup Files
The standard shell on MacOS and Linux is Bash; however, it is common to use something other than the standard shell as well. The file that needs to be modified will vary depending on what shell is used.
Users can identify what type of shell is being used by looking at the top of the terminal window:
- If the user runs the Bash shell (.bash) from their terminal, they need to update .bash_profile or bash.profile.


- If the user runs the Zsh shell (.zsh) from their terminal, they need to update .zshrc.


- If the user runs a different shell than the two above, the file they need to update will differ.
Example for Mac OSX (Using .bash_profile)
- Open the shell startup file through your terminal window.
- Enter this command to open your .bash_profile:
nano .bash_profile - Enter these lines into your shell startup file.
export GEN_ROCKET_HOME=~/genrocket
export PATH=$PATH:$GEN_ROCKET_HOME/bin
export JAVA_OPTS=-Xms512m -Xmx2048m --add-opens java.base/jdk.internal.loader=ALL-UNNAMED --add-opens jdk.zipfs/jdk.nio.zipfs=ALL-UNNAMED
Since the default is the home directory on a Mac, the first line must be entered like this: export GEN_ROCKET_HOME=~/genrocket.
Please note that the first line should point to your path, and this may vary per computer.
To exit this screen, press Control + X.

Enter Y to save the change.

Then press the Enter Key to finish.

You will be returned to the terminal window.
Step 4 - Run the "genrocket" command in Terminal Window
- Open a new terminal session and type genrocket on the command line.
- Press the Enter Key.

Next Steps
Once the initial installation and setup steps have been successfully completed, you must configure your Resources and download your GenRocket profile (my profile.prg).
To learn more about setting up your Resources, please see this Knowledge Base section: Organization Resources.
To learn more about downloading your user profile, please see this article: Mac OSX/Linux: How do I download and set up my profile.prg?.