Description
This article provides step-by-step instructions for a new GenRocket Runtime setup on a local user machine, shared machine, or server. If Runtime has already been installed, please see one of the following articles for making updates:
IMPORTANT: Only follow the steps in this article if you have completed the prerequisite steps listed here: GenRocket Runtime Overview.
Dependencies
- GenRocket User Account - Required to download files and complete the GenRocket Runtime installation.
- Internet Connection - Required to download necessary files (Runtime, Helper Libraries, User Profile)
- Java Runtime - Versions 8 (except 1.8u20), 11, 17, 21, or 24
- GenRocket Jars - gr-engine.jar, gr-receivers.jar, gr-grepository-servers.jar, gr-grepository-clients.jar
Runtime Setup Steps
- Step 1 - Download GenRocket Runtime
- Step 2 - Extract the GenRocket Runtime File
- Step 3 - Update Your Environment Variables
- Step 4 - Run the "genrocket" Command
- Step 5 - Download Helper Libraries
- Step 6 - Resource Paths and Profile (Local User Machine or Shared Machine)
- Step 7 - Resource Paths and Profile (Automated Test Servers - Users Do Not Log In)
- Validate Setup
Important: Thie genrocket zip file (downloaded in step 1 below) should be extracted or placed in a valid user directory. Do not use 'genrocket' for the username, as the runtime will reside in a 'genrocket' folder within the defined path. Full path examples are shown below:
- Correct - C:\users\someuser\genrocket
- Incorrect - C:\users\genrocket\genrocket
Step 1 - Download GenRocket Runtime
The zipped file can be downloaded directly from the GenRocket web platform, or using a CURL or Wget command. You can view the most recent version number in the GenRocket web platform (as shown in Option 1 below).
Method 1- Download from the GenRocket Web Platform
- Log into the GenRocket Web Platform
- Select the Options menu.
- Select Download Runtime #.#.##.

IMPORTANT: If you've downloaded this file locally and plan to set up Runtime on a machine without internet access, you must transfer the file to that machine or server, placing it in any convenient location.
Method 2 - CURL or Wget Command
You can also use a wget command if it is supported by your operating system. Replace 'curl' with 'wget' in the curl command. The rest of the command is the same.
For more information, please see this article: Using CURL Commands to Download Runtime, Jars, Docker Image, and Server/User Profile.
Step 2 - Extract the GenRocket Runtime File
Once the download is complete, you must extract the GenRocket Runtime into your Home Directory. For a local machine, this is usually: (C:\Users\<Your User Name>). If this is a shared machine, it will need to be extracted to a shared location. You can do so through Windows File Explore or Windows PowerShell.
Method 1 - File Explorer
- Navigate to the location where the file was downloaded (e.g., C:\Users\<User Name>\Downloads).
- Select the GenRocket Runtime zip file (genrocket-#.#.#) and select Extract All...

- Click Browse... to select your Home Directory.
- Once selected, click on Select Folder.


- Click Extract at the bottom of the pop-up window.

- Go to your home directory, and you will see the genrocket-#.#.#. folder.

- Rename the folder to genrocket.

Method 2 - Windows PowerShell Commands
Windows PowerShell can be used to extract the file to a specific location and rename the folder to 'genrocket'. Please note that the user must have Admin permissions for this method. You can locate the PowerShell application and right-click to run as administrator.

Command 1 - Extract File
This command can be used to extract a file to a specified location.
Expand-Archive -LiteralPath 'zip file path' -DestinationPath 'destination file path'
Example: The command below will unzip the file to the server user's HOME directory.
Expand-Archive -LiteralPath 'C:\Users\Username\Downloads\genrocket-3.5.42.zip' -DestinationPath 'C:\Users\Username'
Command 2 - Rename Folder
The rename command can be used to rename a folder or file.
Rename-Item -Path 'filepath' -NewName 'new file name'
Example:
Rename-Item -Path 'C:\Users\username\genrocket-3.5.42' -NewName 'genrocket'
Runtime File Extraction Troubleshooting
If you happen to extract the Runtime to the default location, you will end up with a directory system that looks like this:
- genrocket/
- genrocket-#.#.#/
- bin
- lib
- genrocket-#.#.#/
To fix the problem, only move the sub genrocket directory containing the bin and lib folders into your home directory. Be sure to remove the version number from the end of the folder name. It will look like this once finished:
- *Your Home Directory*/
- genrocket/
- bin
- lib
- genrocket/
Step 3 - Update Your Environment Variables
This section will only show how to do so for File Explorer. This can be done through Windows PowerShell or a Command Prompt, but those steps will not be shown here.
IMPORTANT: You need admin rights to update your environment variables.
- Type environment into the Search Bar.

- Select Edit the system environment variables option in the search results.

- Click on Environment Variables at the bottom of the System Properties window.

- For a local install (single user), select New... in the User Variables section.

- For installation in a shared location (multiple users), select New... in the System Variables section.

Step 3a - Add a GEN_ROCKET_HOME Variable
IMPORTANT: This is a user variable for local user machines or workstations. It will be a system variable when setting up on a shared machine.
- Name: GEN_ROCKET_HOME
- Value: The value is the location path of the GenRocket Runtime.
- Example: C:\Users\yourUserName\genrocket
- Click OK.


Step 3b - Add (or Modify) the PATH User Variable
This is a user variable for local user machines or workstations. It will be a system variable when setting up on a shared machine.
Add the following value to the PATH variable. This variable will already be present in many cases because it is used by other applications as well.
If it is not available, you will need to create it. Otherwise, you need to add the value below to the existing PATH variable (both shown below for a local installation)
Create a New PATH Variable
To create a new PATH variable, select New as done for the GEN_ROCKET_HOME variable and complete these steps:
- Enter Name: PATH
- Enter Value: %GEN_ROCKET_HOME%\bin
- Click OK.

Update PATH Variable
If you already have a PATH variable, just add the %GEN_ROCKET_HOME%\bin to the end of it.
Depending on your version, you may need to put a semi-colon after the last value before you add your value.
- Example: C:\Some Other Path;%GEN_Rocket_Home\bin


Note: The steps above may vary per operating system version.
Step 3c - Check JAVA_HOME System Variable Path
This system variable should already have a valid value. Sometimes, the path must be corrected (e.g., points to the wrong Java version). For example, it might have an invalid path similar to the one shown below.
- Invalid: C:\Program Files\Java\jre-1.6\jdk-14.02
- Valid: C:\Program Files\Java\jdk-14.02
Correcting this before continuing with the setup will prevent a command line error.
Select the variable and click Edit to enter or browse to the correct path.

Step 3d - Add a New System Variable for Later Java Versions
If you use later versions of JDK or JRE, an additional system environment variable will be needed to run GenRocket Scenarios in your Command window successfully. Not Required for Java Version 1.8.
- Name: JAVA_OPTS
- Version 11 Value:
--add-opens java.base/jdk.internal.loader=ALL-UNNAMED --add-opens jdk.zipfs/jdk.nio.zipfs=ALL-UNNAMED
- Version 17, 21, 24 Value:
--add-opens=java.base/java.lang=ALL-UNNAMED
- Click OK.

Step 3e - (Optional) Add the Following Value to the JAVA_OPTS System Variable
When generating large amounts of data, the following can be added to the JAVA_OPTS variable. It will help with performance.
-Xms512m -Xmx1024m -XX:-UseGCOverheadLimit

-Xms512m -Xmx1024m -XX:-UseGCOverheadLimit --add-opens java.base/jdk.internal.loader=ALL-UNNAMED --add-opens jdk.zipfs/jdk.nio.zipfs=ALL-UNNAMED
Step 3f - Save Your Changes
You must close the following windows before continuing. Otherwise, the changes will not be recognized.
- Click OK within the Environment Variables dialog to save your changes.

Note: The PATH value will change to this once saved: (C:\Users\User Name\genrocket\bin). - Click OK again to close the System Properties window.

Step 4 - Run the "genrocket" Command
- Close any open command prompts and open a new one.
- Run the genrocket command once to download the other dependent GenRocket jars to the lib folder in your genrocket directory.

Note: If the 'genrocket' command does not automatically download the additional jar files, you can download them manually from the GenRocket web platform through the Options menu or by using CURL commands. You do not have to download the GenRocket Jar because it is included in the GenRocket Runtime file. The downloaded jars should be placed in C:\users\username\genrocket\lib. Use the genrocket -cl command to remove older jar files.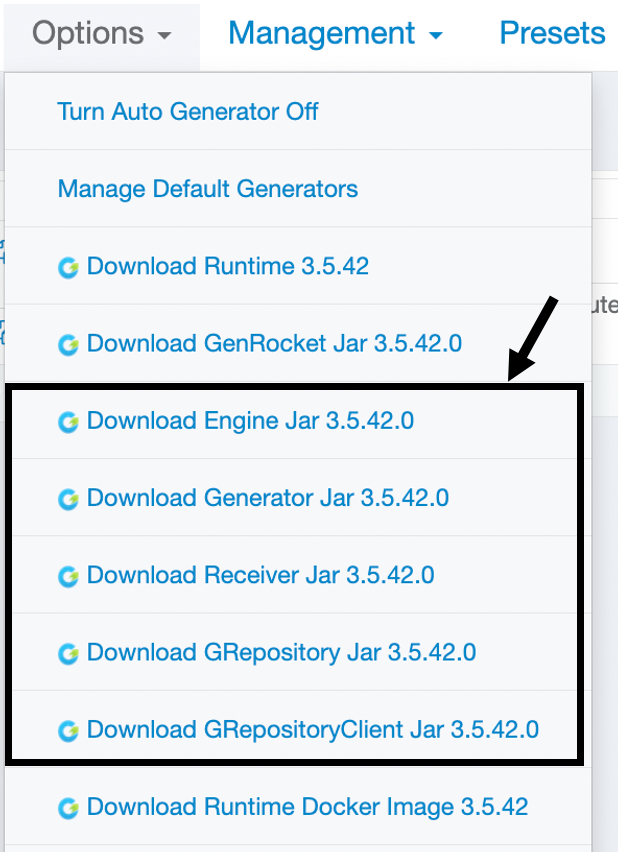
- You are ready to continue to the next step if you don't get any errors. If you receive an error, please see this page: GenRocket Runtime Installation Error.
- A default .genrocket folder will also be automatically created in your home directory (usually C:\Users\User Name\). When Runtime is installed in a shared location, the .genrocket folder will be created in that designated location. If you do not see this folder, it may be hidden. Try unhiding files in the directory.

Step 5 - Download Helper Libraries
Next, run the genrocket -lib command to download the GenRocket Helper Libraries, which the Engine API, GMUS, and other Genrocket components require.
genrocket -lib

Note: If you have trouble downloading the libraries with the command, you can do so from the GenRocket web platform by expanding the Options menu and selecting Generator Help Library and Receiver Help Library. These files need to be placed in the .genrocket folder in your home directory (usually C:\Users\username\).
Step 6 - Resource Paths and Profile (Local User Machine or Shared Machine)
This includes a Server that users have the ability to log into with their own account/profile. If this is a Server that users will not log into to generate data, please skip to Step 7 in this article.
Step 6a - Configure Organization Resources
Three default resources need to be configured. When multiple users are using one central server/machine to generate test data, each user must complete this step. You can use one of the following commands to determine the home directory.
Command Prompt
echo %USERPROFILE%
Windows PowerShell
$HOME
Step-by-Step Instructions
- Go to the Project Dashboard.
- Click the Pencil to fill in each resource value.

The value for the resource.home.directory will be the user's home directory (e.g., C:\Users\Username).
- The rest of the resource values can be in any location, but they should not be the same as the home directory path. It is recommended that you use a subdirectory.
- Enter N/A into the resource.jdbc.directory if you are not connecting to a database. To learn more, click here.

Step 6b - Download User Profile
The file should be downloaded and placed in the .genrocket folder in the user's home directory. For multi-user servers/machines, each user profile should be downloaded and placed in the .genrocket folder. In most cases, the profile will be downloaded to the Downloads folder. If you are downloading the file locally, you can use SSH to move it to the desired machine or server.
Method 1 - GenRocket Web Platform
- Expand the Download menu and select Download My Profile.

- Some browsers will try to block the download because it is not a recognized file type.
- You will need to instruct the browser to continue with the download (e.g., Keep). This varies per browser.

Method 2 - CURL Commands
You can also use CURL commands to obtain an Access Token and download the User Profile. Please note that a CURL command can only be used if CURL is supported. To learn more about available CURL commands, click here.
Step 6c - Move Profile to .genrocket Folder
This User Profile will need to be placed in the .genrocket folder that was created in Step 4. This can be done in one of two ways:
Method 1 - Command Prompt
Open a command prompt and set the path to the directory where the downloaded profile is located. Then enter the following command:
move filename destinationFolder
Example:
move GRXXXXXXProfile.grp C:\Users\Username\.genrocket
Method 2 - File Explorer
Use File Explorer (or Keyboard Shortcuts) to copy and paste the file into the .genrocket folder.
- Right-click on the profile and select cut or copy.
- Alternatively, select the file and use the cut or copy icon at the top of the window.

- Browse to your home directory and locate the .genrocket folder.
- C:\Users\Username\.genrocket
- You may need to show hidden files to see it.
- Then, right-click on the .genrocket folder and select paste.
- Alternatively, use the paste icon at the top of the window.

Note: You can also open two windows and drag and drop the file to the .genrocket folder.
Step 7 - Resource Paths and Profile (Automated Test Servers - Users Do Not Log In)
This is only needed for servers where no specific users are tied to them, such as a Test Automation Server where automated tests or suites of tests will be performed. Only Org Admins can add a Named Server to the GenRocket web platform. The basic steps are provided below:
- Add A Named Server (Org Admin)
- Select Server and Configure Server Resources
- Download Server Profile
- Place Server Profile in .genrocket Folder
Step-by-step instructions are provided here: How to Add a Named Server and Download Your Server Profile.

Validate Setup
After following the steps in this article, please take a few moments to verify that GenRocket Runtime has been successfully set up. You can do so by following these steps.
- Log into the GenRocket web platform.
- Create a Project with 1 Domain and 1 Scenario.
- A sample project has been created with a User Domain and User Scenario.
- The DelimitedFileReceiver has been assigned and will generate one record as a delimited file.

- Download the Scenario to your local computer.
- Open a command prompt and ensure it points to the appropriate directory (Scenario location).
- Run the Scenario by entering the following command in a terminal window:
genrocket -r <ScenarioName>.grs
Example:
genrocket -r UserScenario.grs
If you do not receive any errors and the file is created, then GenRocket Runtime has been set up correctly. File data is shown below:
