Description
This article provides step-by-step instructions for a new GenRocket Runtime setup on a Linux Server. If you're installing on a remote server without internet access, download files locally and transfer them via SSH using the command provided in this article. For Linux Servers shared by multiple users, remember to install Runtime in a shared location.
Note: If Runtime has already been installed, please see one of the following articles for making updates:
Important: Only follow the steps in this article if you have completed the prerequisite steps listed here.
Dependencies
- GenRocket User Account - Required to download files and complete the GenRocket Runtime installation.
- Internet Connection - Required to download necessary files (Runtime, Helper Libraries, User Profile)
- Java Runtime - Versions 8 (except 1.8u20), 11, 17, 21, or 24
- GenRocket Jars - gr-engine.jar, gr-receivers.jar, gr-grepository-servers.jar, gr-grepository-clients.jar
Runtime Setup Steps
- Step 1 - Download GenRocket Runtime
- Step 2 - (Remote Server Only) - Copy the Zip File to the Remote Server
- Step 3 - Unzip the GenRocket Runtime File (genrocket-#.#.##.zip)
- Step 4 - Rename the Unzipped Folder to genrocket
- Step 5 - Set the Environment Variables
- Step 6 - Run the genrocket Command
- Step 7 - Download Helper Libraries
- Step 8a - (Multiple Users) - Configure Resource Paths and Download User Profile
- Step 8b - (Automated Testing) - Add a Named Server and Download Server Profile
- Validate Setup
Step 1 - Download GenRocket Runtime
The zipped runtime file can be downloaded directly from the GenRocket web platform or by using a CURL or Wget command.
The version number may differ from the one in the images and commands below. You can view the most recent version number in the GenRocket web platform (as shown in Option 1 below).
Method 1- Download from the GenRocket Web Platform
- Log into the GenRocket web platform
- Select the Options menu.
- Select Download Runtime #.#.##.
- Move the file to the server (to any arbitrary location)

Method 2 - CURL or Wget Command
You can also use a wget command if it is supported by your operating system. Replace 'curl' with 'wget' in the curl command. The rest of the command is the same.
For more information, please see this article: Using CURL Commands to Download Runtime, Jars, Docker Image, and Server/User Profile.
Step 2 - (Remote Server Only) - Copy the Zip File to the Remote Server
If your remote server lacks internet connectivity and you downloaded a zip file to your local machine, you'll need to transfer it to the remote machine using SSH before continuing.
scp '/path/to/your/download/genrocket-#.#.##.zip' user@remoteip:/home/directory
Step 3 - Unzip the GenRocket Runtime File (genrocket-#.#.##.zip)
Next, unzip (or extract) the downloaded runtime file. Make sure the path is correct, and then use the following command to unzip the downloaded file:
unzip genrocket-#.#.##.zip
Important: This file should be extracted or placed in a valid user directory. Do not use 'genrocket' as the username, as the runtime will reside in a 'genrocket' folder within the path. Full path examples are shown below:
- Correct - /home/someuser/genrocket
- Incorrect - /home/genrocket/genrocket

Step 4 - Rename the Unzipped Folder to genrocket
The unzipped folder will need to be renamed to 'genrocket.' This can be done using the mv command shown below:
mv genrocket-#.#.## genrocket
Step 5 - Set the Environment Variables
1. Go to the Home directory.
cd $HOME2. Look for the .bashrc file.
3. You can use the following to verify it is present.
ls -la ~/4. If the file is not present, use the vi command to create it. If it is there, open the .bashrc file using the vi command:
vi .bashrc5. After opening the file, change to insert mode by typing i.
6. Add the following statement to add the new environment variable in .bashrc:
export GEN_ROCKET_HOME=<PATH_WHERE_ UNZIPPED_GENROCKET_IS>
Example:
export GEN_ROCKET_HOME=/home/divyasetia/Desktop/output/runtime/genrocket7. After adding the above environment variable, update the path variable:
export PATH=$PATH:$GEN_ROCKET_HOME/bin8. For improved performance when generating large amounts of data, you can also set JAVA_OPTS to the following:
export JAVA_OPTS=-Xms512m -Xmx2048m -XX:PermSize=512m -XX:MaxPermSize=2048m
9. For Java Version 11, add/update the JAVA OPTS system variable to the following.
export JAVA_OPTS=-Xms512m -Xmx2048m --add-opens java.base/jdk.internal.loader=ALL-UNNAMED --add-opens jdk.zipfs/jdk.nio.zipfs=ALL-UNNAMED10. For Java Version 17, 21, and 24, add/update the JAVA OPTS system variable to the following:
export JAVA_OPTS - JAVA_OPTS=--add-opens=java.base/java.lang=ALL-UNNAMED
11. Save the file by pressing the escape key and then typing wq.
Step 6 - Run the genrocket Command
Run the genrocket command once in the new terminal window. This will download the other dependent jars.
It will also create a .genrocket subdirectory, which may need to be unhidden to be viewed.
genrocketThe additional jars will be downloaded if the setup has been successful.

Did you receive an Error Message? Click here to see troubleshooting recommendations for typical GenRocket Runtime installation errors.
Additional Options
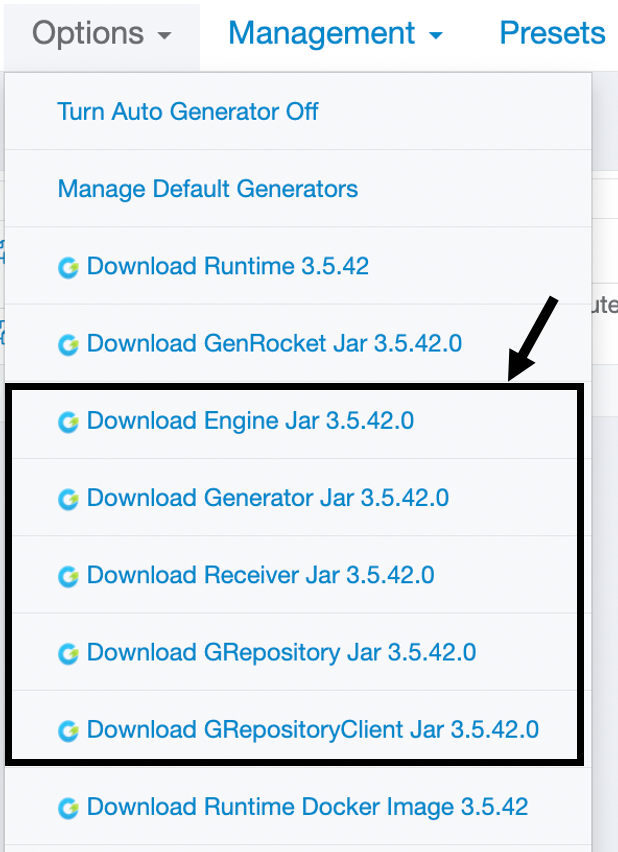
- CURL Commands for GenRocket Jars - CURL commands can also be used to download the other GenRocket Jar files if they do not automatically download. You do not have to download the GenRocket Jar because it is included in the GenRocket Runtime file. Those commands can be viewed here.
- Manual Download from GenRocket Web Platform - These files can also be manually downloaded from the GenRocket web platform through the Options menu. You do not have to download the GenRocket Jar because it is included in the GenRocket Runtime file. The downloaded jars should be placed in /home/users/username/genrocket/lib.
Step 7 - Download Helper Libraries
Next, run the genrocket -lib command to download the GenRocket Helper Libraries, which the Engine API, GMUS, and other Genrocket components require.
genrocket -lib
If the server does not have internet connectivity, you will need to download these libraries from the GenRocket web platform to your local computer and then use SSH to copy them to the .genrocket folder in the server's home directory (usually /home/users/username/).

You can do so by modifying the command in Step 2 of this article. An example is provided below:
scp ssh '/path/to/your/download/GeneratorDescriptions.lib user@remoteip:/home/users/username/.genrocket
Step 8a - (Multiple Users) - Configure Resource Paths and Download User Profile
Each user must configure their Resource Paths and download their profile. The profile must be placed in the .genrocket folder (created in Step 6). This is required for each user to use Runtime in the shared location and generate data.
To see step-by-step instructions, see this article: How Do I Change Resource Values and Download My User Profile?
You can also download the User Profile using Curl Commands: Using CURL Commands to Download Runtime, Jars, Docker Image, and Server/User Profile.

Step 8b - (Automated Testing) - Add a Named Server and Download Server Profile
If you are an administrator setting up a server that is not tied to a specific user and will be used to perform automated tests (CI/CD Pipeline), then a Named Server and Server Profile are required. The steps are as follows.
- Add A Named Server (Org Admin)
- Select Server and Configure Server Resources
- Download Server Profile
- Place Server Profile in .genrocket Folder
Step-by-step instructions are provided here: How to Add a Named Server and Download Your Server Profile.
Validate Setup
After following the steps in this article, please take a few moments to verify that the installation has been completed. You'll be able to do so by following these steps.
- Log into the GenRocket web platform.
- Create a Project with 1 Domain and 1 Scenario.
- A sample project has been created with a User Domain and User Scenario.
- The DelimitedFileReceiver has been assigned and will generate one record as a delimited file.

- Download the Scenario to your local computer.
- Run the Scenario by entering the following command in a terminal window:
genrocket -r <ScenarioName>.grs
Example:genrocket -r UserScenario.grs
If you do not receive any errors and the file is created, then GenRocket Runtime has been set up correctly. File data is shown below:
